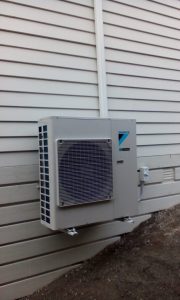
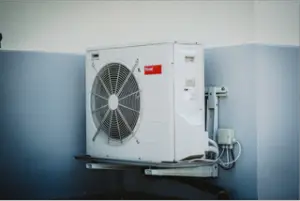
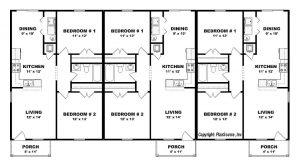
The information below is relevant to those thinking about installing an air conditioner in the single or double storey residential home. There are always going to be a variety of things to consider, including whether it is a new or existing home, the material of the internal wall and the location of the outdoor unit (i.e. the compressor or condenser). Call us on 1300 741 451 once you’re ready to get a quote to install AC in your home or business.


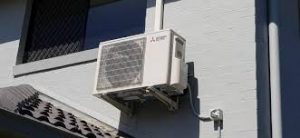
The information below is relevant to those thinking about installing an air conditioner in an apartment. There are always going to be a variety of things to consider, including whether it is a new or older apartment block, the material of the internal wall and the location of the outdoor unit (i.e. the compressor or condenser). You will also need to obtain body corporate approval for installing AC in an apartment block.

Split system air conditioning installation is quiet straightforward and can generally be finished within a day, depending on how many units are being installed. Compared to a ducted system split system units can also work out to be cheaper, depending on a number of factors including size and brand.
There are a few things a professional installer will need to check before giving you an accurate quote on your system.
Before installation commences
A home visit or Facetime will allow installers to evaluate particular aspects of your space prior to installation.
This will include:
Looking at structural aspects of the property helps technicians to determine the most effective place to put the unit and which size or brand may be most appropriate for different spaces within your home.
If you are having multiple units installed throughout the house technicians can design a system to match your property, cooling / heating needs and budget. This includes replacing any units that need updating.
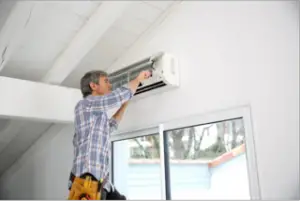
On the day of the installation the process will generally occur in this order:
During clean up you can keep the unit on and ask any questions you might have on how to operate it. Many units come with at least one remote program already installed but this may take a bit of tweaking to make it perfect for your lifestyle. The technician will generally leave you with an operating brochure so you can set individual programs properly. Now the installation is complete you can enjoy your new system but be sure to contact your installer should anything go wrong once they have left.
When installing split systems into new residential homes, it is best to start during the building process. By separating the installation into two stages, Installers can ensure minimal atheistic disturbance to the home, by not needing to lay ducting along walls.
In the first stage, Installers will rough in the pipes, drain and interconnecting electrical cables before the plaster is mounted on the walls. This allows the piping and wiring to be laid inside the walls, or inside the roof or under the house. Laying the wiring and piping under the house is only an option if the base of house is not a concrete slab. By completing the first stage, eliminates the need for any visible ducting to be laid internally or externally on the walls of the house.
Stage 2 only occurs once the plaster has been placed on the walls of the home. Installers at this point will return and fit the internal and external units into their positions.
It is important to note, that some building developers and companies can charge more for air conditioning installation when using their preferred suppliers and also can make it difficult for Homeowners to choose their own Installer, by denying access to the building site to third party air conditioning companies. This can be a challenging situation for Homeowners, however there can be ways around this issue. Generally accredited and experienced installation companies can assist Homeowners in these situations.
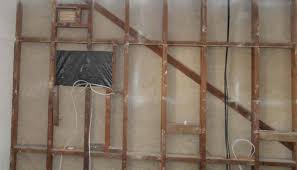
The wiring and piping of an internal unit before plaster goes up (the rough stage).
Installations after plaster has been mounted
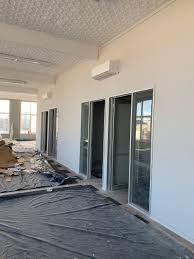
In instances where the installation of a split system is not a simple back-to-back installation, is the perfect example of when it is easier to lay all the piping, wiring and drains down before the plaster walls go up. When the external and internal units of a split system are located very far from each other or are positioned on opposite sides of the house, roughing in the wiring, piping and drain eliminates the need for ducting along walls, leaving an aesthetically pleasing finish.
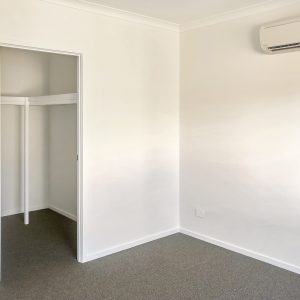
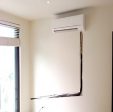
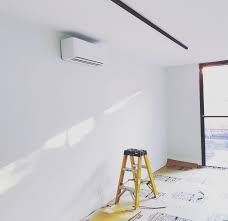
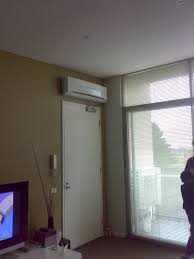
Installation of a split system into a bedroom of a new home
Installation of a split system in a new home with no visible ducting.
Even though back-to-back installations are the cheapest option for Homeowners, it is sometimes money well spent to locate the external units far from the internal units. With back-to-back installations the drawback is that sometimes the external units would need to be placed at the front of the house or in plain sight. However, when the budget allows, the external unit can be mounted on a roof or positioned at the back of the house, which are discreet and out of the way locations.

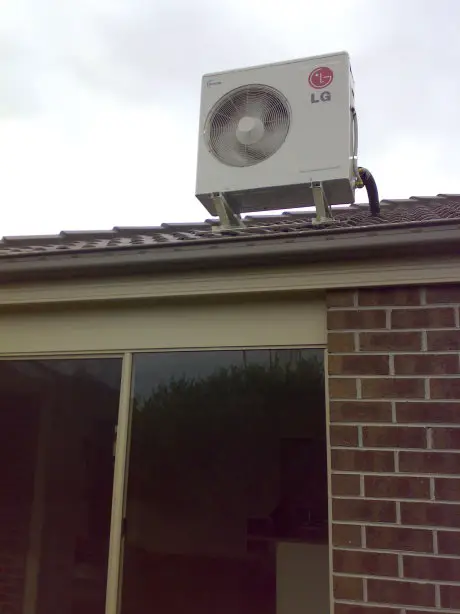
An external unit located at the back of a home on the roof.
Air Conditioning a New Home
When installation occurs whilst a new home is being built, it gives the Installer and Homeowner the chance to install many split systems, whilst minimising the ducting on walls of the house. By roughing in the pipes, drain and electrical cables in first before plastering the walls, makes the installation of the internal units quite an easy process. Even with several internal units, the external units can be positioned out of view, in very discreet places.
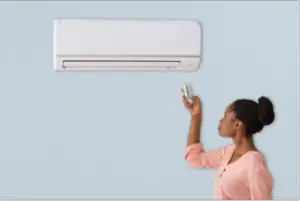
When there are many split systems installed in the home, each room can be controlled individually by its own remote control.
The internal unit installed during the building process
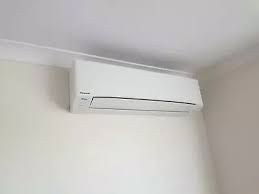
The internal unit installed after the plaster is mounted on the walls
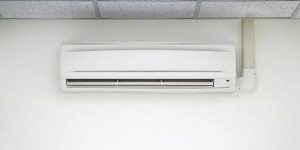
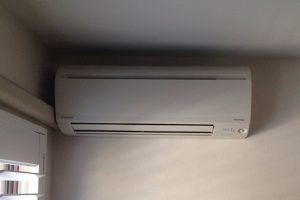
An internal unit without any ducting, allowing for a clean finish on the wall

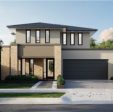
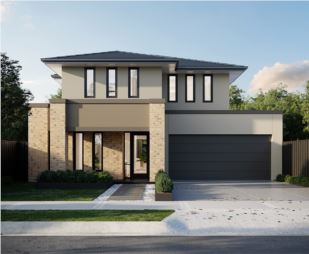
A newly built home with split systems installed, with no external units visible from the front of the house
Are you building your own home and would like to know more? Please call our friendly Compare Air Conditioning team on 1300 944 133 or Request a Quote Now.
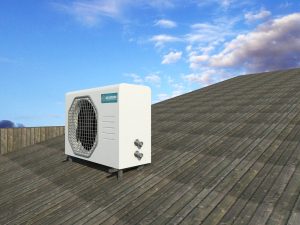
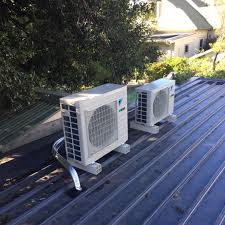
The installation of an external unit of a split system onto the roof of a home, is a common solution in homes, where it is impossible to position the unit on the ground or wall. One example of this is adjoining townhouses, where both sides of the townhouse is connected to other properties. One solution can be to mount the external units on the pitched roof of the townhouse. By installing them as far as possible to the back of the pitched roof ensures that the external units are not visible from the front of the house. An installation like this, however, comes at additional costs, due to the extra materials like piping and labour time.
In instances, where there are many split systems to be installed on one roof, an Installer may recommend installing a multi split system. A multi split system is where many internal units are run by only one external unit. This is a great solution for properties with space restrictions or with unique installation challenges.
In most cases, homeowners will decide to install the external unit on the roof for aesthetic reasons and based on the installation restrictions. When installing on a pitched roof, the pipes are laid through the roof eaves to the external unit mounted on the roof. The drain from the internal unit can be neatly laid next to a door or window frame and then down to the ground or through the floor/decking to a drain. Installations of these types can incur additional costs as the lifting of external units onto pitched roofs can require safety harnesses and railings. However, once completed the external unit is completely out of view from the front of the house or when standing on the ground.
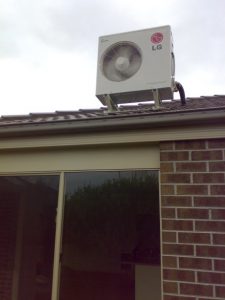
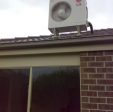
An example of an external unit mounted on the roof at the back of a residential house
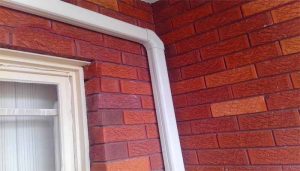
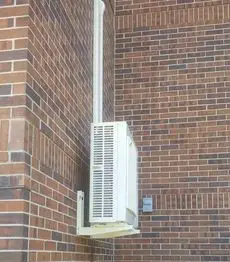
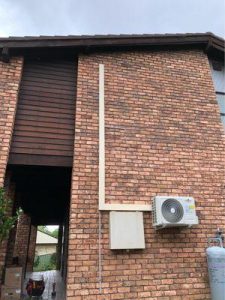
An example of piping mounted onto the wall of a home, which connects between the internal and external units of a split system.
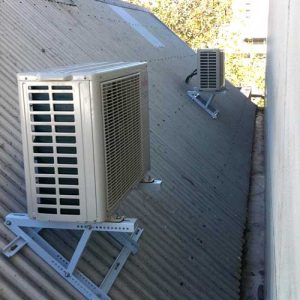
The photo below shows how piping can be inserted through the roof to the external unit mounted on the roof, which is not visible from the ground.
Below is an example of how external units can be mounted at the back of the pitched roof in adjoining properties and not be visible from the front of the home.
Are you interested to know more or would you like a quote to install a split system on the roof of your home? Please call us on 1300 944 133 or Request a Quote Now.
The installation of split system air conditioners into second story rooms of residential homes can vary based on the type of dwelling and roof type. There are a few different ways that a split system can be installed into a second story room, however the location of the internal unit and the owner’s aesthetics preferences are also important factors. Some of the most common types of second story split system installations are discussed below.
Installing a split system in a second story bedroom with the external unit mounted on the second story roof.
In some second storey homes, there is room for the external unit of a split system to be placed on the roof space outside the room, allowing for an easy back to back installation. Back to back installation is where the internal and external units of a split system are placed on the same wall in the same location, with the internal unit inside the room and the external unit on the exact outside position.

There can be challenges to a second storey installation, such as getting the external unit onto the roof itself and can add additional costs. Also in situations where the walls of the second storey room are on an angle, installation is not possible due to the fact that the units need to be perfectly level for effective operation. An internal unit that is installed on an angled wall would lead to water spilling out from the tray inside.
Installation of a Split System in a Second Story Room above a Veranda
With homes that have a veranda roof just below the second storey room, it is possible for Installers to run pipes down through the veranda roof and position the external units under the veranda. This has an additional benefit of the external unit being positioned under a covered roof and protected from the elements and direct sunlight, which can increase the efficiency of the air conditioner.
However, some homeowners may prefer for the external units to be placed above the veranda roof, where they cannot be seen and is more aesthetically pleasing. For Installers this can be a good solution, as it can be just as easy to work from the veranda roof as it is to work off the ground.
It is important to note, that in homes made predominately from wood that there may be some vibration from the units, based on the stability and age of the home. In these cases, it is very important for customers to choose an air conditioning product known for its quietness, to ensure their comfortability.
Installing a Split System in a Second Storey Room above a Pitched Roof
In some homes, Installers may position the external unit of the split system on a second story level above a pitched roof, like above an adjoining garage with a pitched roof. This installation method can sometimes be easier and more economical than other solutions, as the external unit can be mounted on a wall bracket as close to the internal unit as possible. In some situations, the external unit can be positioned at the back side of the pitched roof, which allows the unit to not be not visibly seen from the front of the house.
There can be challenges for Installers when installing above a pitched roof, such as when there are windows in the area around the pitched roof and when there is not much flat space for the Installers to work on.
If there was no pitched roof, the external unit would be positioned either all the way down on the ground or on a wall bracket high up (generally over 2m, above head height) on the wall.
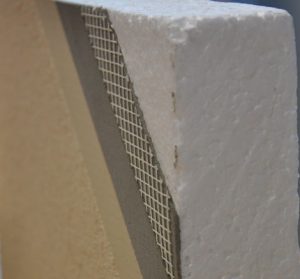
Installing a Spit System into a Second Storey Room that has a Foam Rendered Wall
Sometimes, second storey walls are made from foam and not from brick. A foam wall is made from approximately 150mm thick foam with a render over the top, which gives the wall a solid brick “look”.
To keep costs low, an Installer may position the external unit on the wall above the ground floor roof, however generally a foam wall is not strong enough to hold the wall bracket. It is possible to use extra long bolts and fix into the timber studs inside the wall, however this method may lead to internal vibrations from the unit.
Another solution, which is a little more expensive, is to position the external unit on the ground floor brick wall below the first floor roof. This requires the Installer to drill through the roof, insert the pipes and cables through the roof and out of the brick wall below. The tiled roof needs to be weather sealed with a dectite and silicon. For better aesthetics, the duct covers for the pipes and cables can be matched to the colour of the rendered wall for a nice finish. The external unit is then mounted either to the ground or to the wall below, at a height of over 2m from the ground, basically above head height.
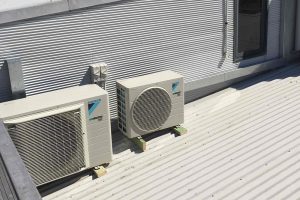
Installing the External Unit of a Split System on a Flat Roof
For a variety of reasons, there are times when the external unit cannot be placed on the ground for second storey rooms installations and even ground level rooms. A common solution is to position the external units on a flat roof adjoining the second storey room or above the ground floor room.
Some customers prefer not to have the external units placed on the ground as the compressors inside the external units blow out hot air when in cooling mode and may impact customers’ gardens.
In situations where the internal unit is inside a downstairs room, Installers will need to lay the piping and cables through the above roof to be connected to the external unit which is position on the flat roof.
If you’re ready to get a quote on the cost to install a split system on a second storey roof, call us in 1300 944 133 or Request a Quote Now
Why Install an External Unit on Wall Brackets?
There are many reasons why an external unit of a split system is mounted on wall brackets, rather than on the ground. Some of these reasons will be discussed further below.
Commonly, the external unit will be mounted off the ground on a wall bracket because the Homeowner has plans to install a decking or paved area around the house, in the future. Therefore, by mounting the external unit off the ground, it removes the need to relocate the unit later or to plan the flooring around the unit.
External units mounted off the ground on wall brackets, as decking will be installed later.
Along the Wall of a Driveway
Positioning the external unit along the driveway of a house is usually something Installers will avoid doing, due to the risk of it being backed into by a car or a car side swiping it.
In some cases, when an external unit has already been located along the wall of the driveway, the unit may be replaced, with new mounting added if needed. It is beneficial if there are brick recesses along the wall, as it provides more protection for the unit. New mounting of wall brackets is the best and safest solution as it keeps the unit off the ground and stops the chance of rainwater flowing down the driveway and into the unit. Wall brackets are powder coated, giving them a long rust-free life span.
Generally, Homeowners will choose to mount the external units off the ground in case they want to lay pavers or install decking underneath. This saves time and money by not having to remove the unit and then reinstall it.
An example of an external wall unit mounted on wall brackets along a driveway.
Above a Pathway
Generally, when installing external units along a pathway, Installers will suggest mounting the external unit on wall brackets. Usually the unit will be mounted high enough, so an average person could walk underneath it easily and not restrict any movement through the pathway.
External units mounted high on wall brackets above a pathway.
Above Uneven Ground
In cases, where the ground underneath is uneven, the best option generally is to mount the external unit on a wall bracket above the ground. Examples of where the ground may be uneven is with a sloping driveway, sloping house block or unfinished outside area. There are two main reasons why mounting the external unit to a wall bracket is the better option.
External units mounted just above an uneven gravel surface.
Above a Garden Bed
Mounting an external unit above a garden bed is possible, especially when there are budget concerns and positioning it elsewhere would be more expensive. However, an external unit placed in or above a garden bed is not always the best option as the warm and cold air flowing from the working unit, can impact anything growing in the garden bed.
An external unit mounted on wall brackets just above a garden bed.
If you’re ready to get a quote on the cost to install a split system on brackets, call us in 1300 944 133 or Request a Quote Now
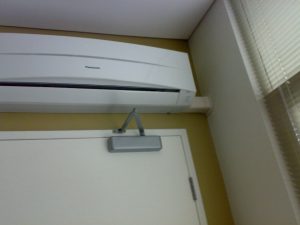
In some cases, the inside unit of a split system needs to be mounted on an internal wall of an apartment, with the external unit located on one of the outside walls. Therefore, the piping and drain need to be laid from the inside unit, to the outside wall of the apartment. Generally, the most common way is to cut into the plaster wall, so that the piping and drain can be laid inside the wall, leaving a neat finish
is is not without additional costs as the re-plastering process usually costs around $400-$500. However, for Homeowners where aesthetics is more important than budget, this is best option.
Are you interested to know more or would you like a quote to install a split system? Please call us on 1300 944 133 or Request a Quote Now.
Can split systems air conditioners be installed on internal walls? Yes, they can! Below are some examples of installations of split systems on internal walls.
Running Pipes Through a Pitched Roof of a House
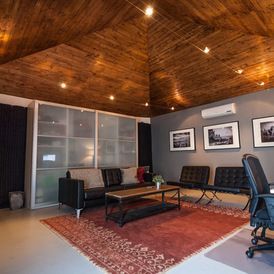
Some installations of split systems require the inside unit to be located on an internal wall, with the piping laid up through the roof. The running of pipes through the roof is good in situations where houses or rooms have cathedral ceilings. Generally, Installers will find the best place for the internal unit, which also has easy access to the roof space. Also, Installers will look at the best height to place the internal unit, to ensure that it can extract the heat from the high ceilings effectively.
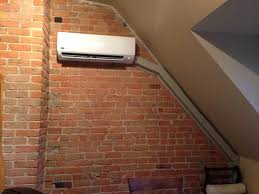
Example of a split system installed in a house with cathedral roofs, with the piping run through the roof
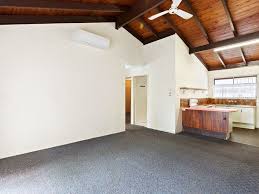
Example of an inside unit inside a house with cathedral roofs and no visible ducting
Installing Split Systems on Internal Brick Walls in Older Style Heritage Listed House
Generally, heritage listed homes are regulated and restricted to changes that can be made to the front of the house. This means that the external unit nor any external ducting is allowed at the front of the house. In most cases, it is best to run the pipes internally through the roof, which may involve a small amount of internal duct work to reach the roof. External units can be mounted using brackets at the back of the pitched roof, out of sight.
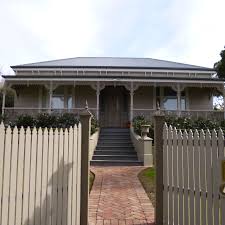
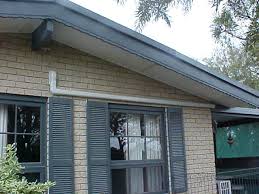
An example of a heritage listed home
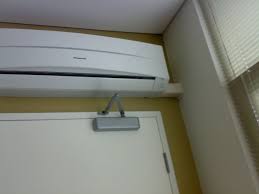
An external unit mounted at the back of a pitched roof
An internal unit with piping run up through the roof, with a small amount of ducting
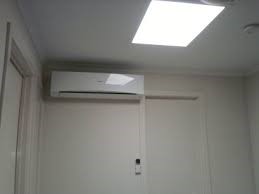
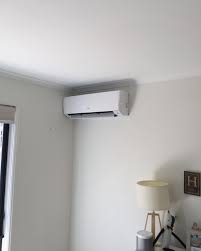
Installing a Split System on an Internal Wall of a Home
In some cases, it is necessary to install the inside unit on an internal wall of the home. This usually happens when there is no way to position it on the external walls. Again, it is best to run the pipes through the roof via a wall cavity, with the external unit mounted at the back of the roof or at the back of the home with ducting.
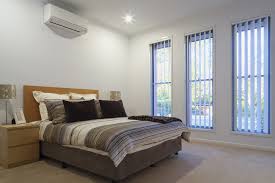
An inside unit in a bedroom positioned on an internal wall, with the pipes run through the roof
External units mounted on a flat roof at the back of a house
An external unit positioned at the back of a home, with ducting on the wall
Installing a Split System on an Internal Brick Wall of an Older Style Apartment
In apartments, the actual layout impact greatly on where to position the split system. In some cases, the lounge room has no external walls, due to the apartment being in the middle of two other apartments. In this situation, the pipes can be laid through the wall to another room, like a bedroom to the outside external wall or up through to the roof, if it is a top apartment. Any external work outside the apartment needs body corporate approval.
A split system with ducting to the external wall of an apartment
An example of a split system installed on an internal wall of an apartment with the pipes run through the roof.
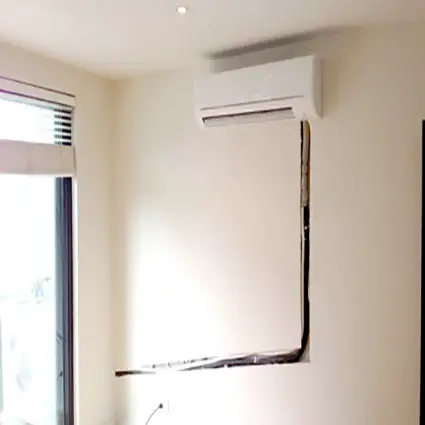
Installing a Split System on an Internal Wall of a Home by Cutting the Plaster
In some cases, Installers may need to cut the plaster to run the pipes to the external unit, when installing on an internal wall of a home. For homes with no concrete slab underneath, there is also an option to run the pipes underneath the house as well. Or in other situations, they can be run to an external wall, where the outside unit is mounted on wall brackets.
An external unit can also be positioned underneath decking, which keeps the unit out of sight as well protected from the elements, like sunlight and rain. This can help the overall efficiency of the unit by minimising the wear and tear caused by the elements.
An example of the plaster being cut to run the piping out to the external wall
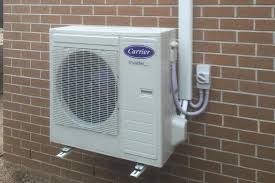
An external unit mounted on wall brackets on an outside wall of a house
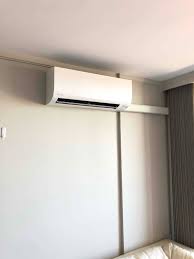
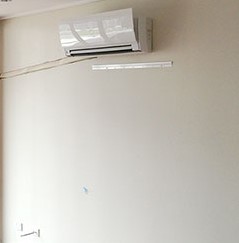
Installing a Split System on an Internal Wall of a Residential Home, with Internal Ducting
There are several ways that a split system can be installed on an internal wall of a home. Homeowners are often given the choices and recommendations by Installers and Homeowners preferences based on atheistics and budget, can influence where a split system is positioned. The best solution generally, is to position the internal unit on a wall, in the corner of the room. The corner backs onto an external wall, which limits the need for internal ducting.
However, if the Homeowner prefers that the internal unit is placed centrally in the room, ducting will need to be laid across the room, as well as on the external wall.
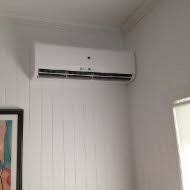
An internal unit placed in the corner of a room

Another example of an internal unit in the corner of the room
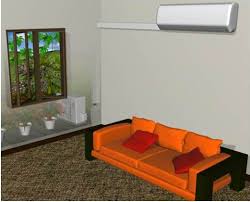
A computer design of an internal unit placed centrally in a room, with internal ducting to the external wall
Are you interested to know more or would you like a quote to install a split system in your home or apartment? Please call us on 1300 944 133 or Request a Quote Now.

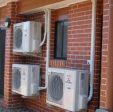
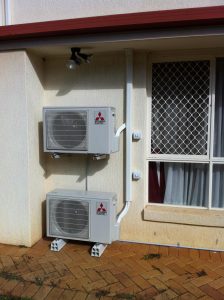
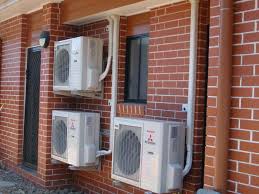
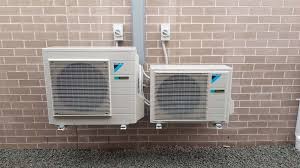
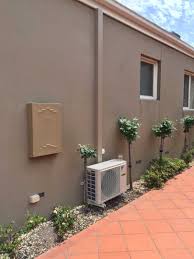
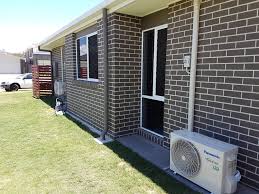
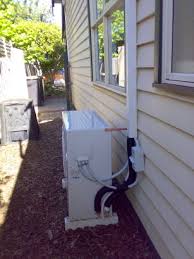
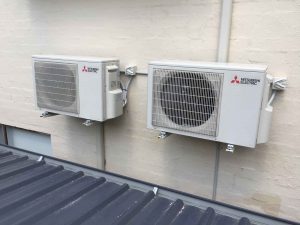
The external units of splits system can be installed along the side of a house, which can be a discreet and out of the way location. Multiple units can be placed along one wall, with units positioned either on the ground or on wall brackets, usually above head height. Sometimes, depending on what is on the ground below, positioning the external unit on the ground may be a not an option. This happens in cases where there is a pathway along the wall, which would put the unit in the way and make access along the path difficult.
External units mounted high along a side wall of a home
Side walls are a great option for basic back-to-back installations, which is where the external unit and internal unit are on opposite sides of the same wall. Generally, it is important to ensure that the side wall has enough space to be still used for moving things, like bins, after installation.
For older style weatherboard homes, mounting the external unit on the wall is not really an option, because the unit generally will be too heavy for the wall itself. In most cases for weatherboard homes, the external unit can be placed along the ground or mounted on the roof. The ducting for the piping can be painted to match the existing wall and its colour scheme.
An external unit mounted on the ground, next to a side wall of a weather board home
It is important to let an Installer know if you are planning on any future renovations or extensions on your home, as this can impact the decision of where to install the split system and its external unit. The photo below shows an example of where the owners plan to concrete a paved area in the future, along the wall and near the door. The solution was to mount the external units along the brick wall, clearing the height of the future flooring.
In some cases, especially there is to be wooden decking to be installed, the drains for the indoor and outdoor drains can be routed to the drainpipe of the house. This is necessary to ensure to stop any water damage to the decking, once built.

The external units mounted along a side wall, above the height of the future concrete flooring
Are you looking at installing a split system into your home or would like a quote to install a split system along a side wall of your home? Please contact us on 1300 944 133 or Request a Quote Now.
Installations of split systems into high-rise buildings can present unique challenges. Below is some important to take into consideration when looking at installing a split system into a high-rise.
Below are some installation examples and remember by choosing an experienced and accredited installer, they will make the process easy, as they are experienced dealing with all the body corporate requirements.
Installation of a Split System into the Bedroom of a High Rise Apartment
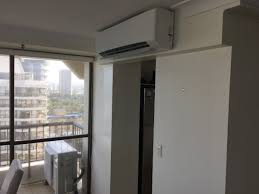
The layout of the apartment can determine the necessary installation position, however in most cases the best solution is to install the internal unit against an external wall. If this is not possible, plaster may need to be cut to run the piping through the wall or to place internal ducting along the wall.

The internal unit in the bedroom of a high-rise apartment
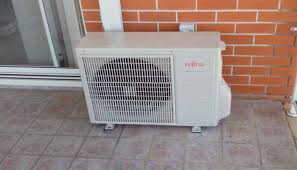
An external unit outside the bedroom of an apartment in a high-rise building
Installation of a Split System into the Lounge/Kitchen area
Installations into the lounge/kitchen areas of high-rise apartments are usually quite straightforward, however there are times when the plaster cannot be cut to place the piping inside the wall. For example, when there is a hallway or doorway between the internal unit and the external wall. Some units may have a bulkhead, which is a section of ceiling that has been dropped and boxed-in or enclosed. The piping can be laid inside the bulkhead to the external wall.
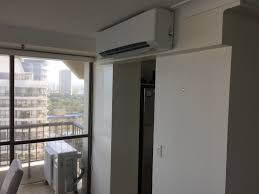
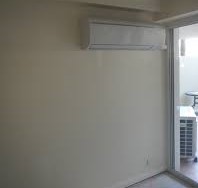
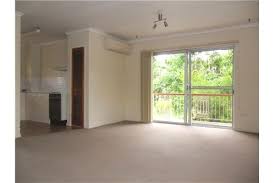
An internal unit in the lounge of a high-rise apartment
If the Internal unit is located near the laundry or bathroom the drain can be feed right into the waste. If that is not possible a water pump can be installed to extract the condensation from the internal unit. This option is generally avoided as waters pumps can cause problems over time.
Install of a Split System with no External Ducting
Some body corporates may specify that there is to be not external ducting on the outside of the building, which may scare off some Installers. In these cases, the Installers may need to think creativity. For example, in one such case, the internal unit was placed in the lounge room, however it backed onto the bedroom which had an inbuilt cupboard. The wall was cut through and the internal ducting laid through the cupboard to the exact place of the external unit on the balcony outside, which meant no external ducting was needed and was visually a very neat job.
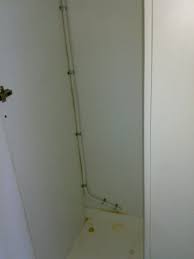
The piping is laid inside the cupboard for a discreet look, ducting was added later
Installation of a Split System- Side Back to Back Style
One of the easier installations in a high-rise apartment is a side back to back installation style. It is essentially the same as a back to back installation, except the piping exits to the side into a corner, which goes out to the external balcony. The external unit is positioned as close as possible to this corner and external ducting is generally required.
The external unit outside on a balcony with external ducting
An example of a side back to back installation in a high-rise apartment
Installation of a Split System with Internal Ducting
In most high-rise apartment installations, the piping, drain and electrical cable can be run out to the balcony. However, in cases, including when the body corporate does not allow visible external ducting, the pipes may need to located out at a lower level. This means internal ducting or cutting the plaster and installing the pipes inside the walls, is necessary.
Sometimes internal ducting is the only solution because Homeowners do not want to replaster the wall or there is not enough space in the wall cavity to hold the pipes. Internal ducting is where the pipes are laid along the wall and covered with a plastic molded duct cover, which can be painted to match the wall colour. If well positioned, it can be very discreet, however it also depends on the personal preferences of the Homeowner.
External unit on a balcony of high-rise apartment with low ducting
Installation of a Split System with Cutting the Plaster to Run the Pipes.
When installing a split system onto an internal wall of a high rise apartment, the plaster can be cut to lay the piping inside the wall and then run out to the external wall. Sometimes after installation replastering is necessary and depending on the location can add $300-$400 to installation costs.

Wall replastering
Would you like to know more or would you like a quote to install a split system in your high-rise apartment? Please call us on 1300 944 133 or Request a Quote Now.
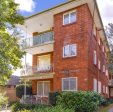
Older style apartments which were built during the 1950’s, 1960’and 1970’s are generally double brick buildings, which make them well insulated. These apartments are perfect for split system air conditioners, as the double brick helps to keep the heat in or out.
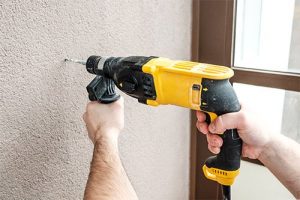
Typically, the internal brick walls inside the older style apartments are covered in render, so the installation of a split system needs to be performed very carefully and properly. Heavy drilling is required and can cause damage, if performed quickly or by an inexperienced installer.
Below are some examples of split system installations into older style apartments, as installations vary based on the layout and positioning of the apartment.
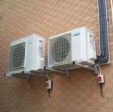
Example 1- Older Style Apartments with Double Brick Walls
Older style apartments have walls with double brick, which means drilling is involved when installing a split system. The double brick walls are covered in render, which can age over time and become fragile and brittle. The drilling requires patience and skill to complete, generally an experienced Installer will possess.
To limit damage to the floors, Installers will cover the floor, with something like cardboard to protect the flooring from pieces of brick and mortar that may fall during drilling. Older style apartments have sometimes been renovated, so extra care is also necessary in these installations. In some cases, owners will choose to move the positioning of the older units to suit their renovation or for atheistic purposes. For example, they may want the external unit moved to a more discreet location, however additional costs are involved and may not suit everyone’s budget.
With 2-bedroom units, generally a split system in the master bedroom and one in the kitchen/lounge is enough to keep the apartment air conditioned effectively. Also the double brick apartments, especially the bottom floor apartments, with another unit on top, are very well insulated already.
Drilling is required for installations on rendered double brick walls
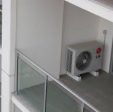
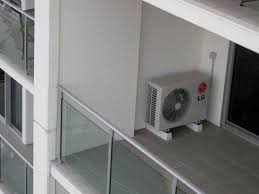
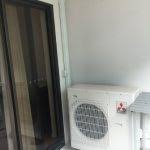
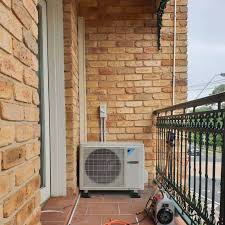
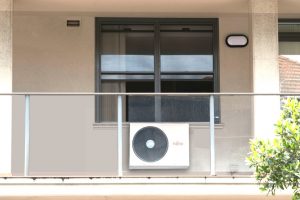
Example 2- Installation of an External Unit of Split System on a Balcony
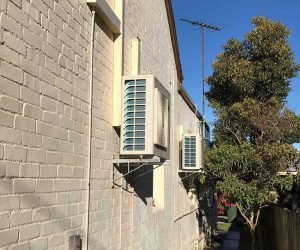
For some apartment owners, the balcony space is very important, and they prefer not lose space because of the external unit. In cases like this the external unit can be mounted on wall brackets just off to the side of the balcony.
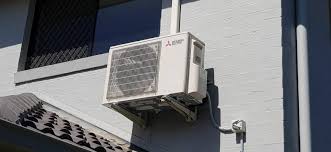
An external unit installed off the balcony on wall brackets
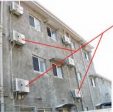
Example 3- Installing a Split System into a Third Floor Apartment
For third floor apartments, there are a few options for split system installations, however, may require more to install. The internal walls of older style double brick apartments are also solid brick and can messy when installing.
For the external units, it is possible to mount them on the roof of the apartment block or the roof of the balcony or on the balcony itself. Roof installations may require a scissor lift to install on the roof of a third storey apartment, which comes at additional costs. In cases where the installation is on the outside or roof of the apartment block, body corporate approval is required.
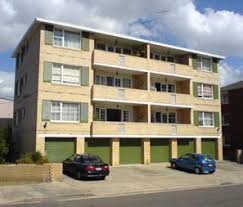
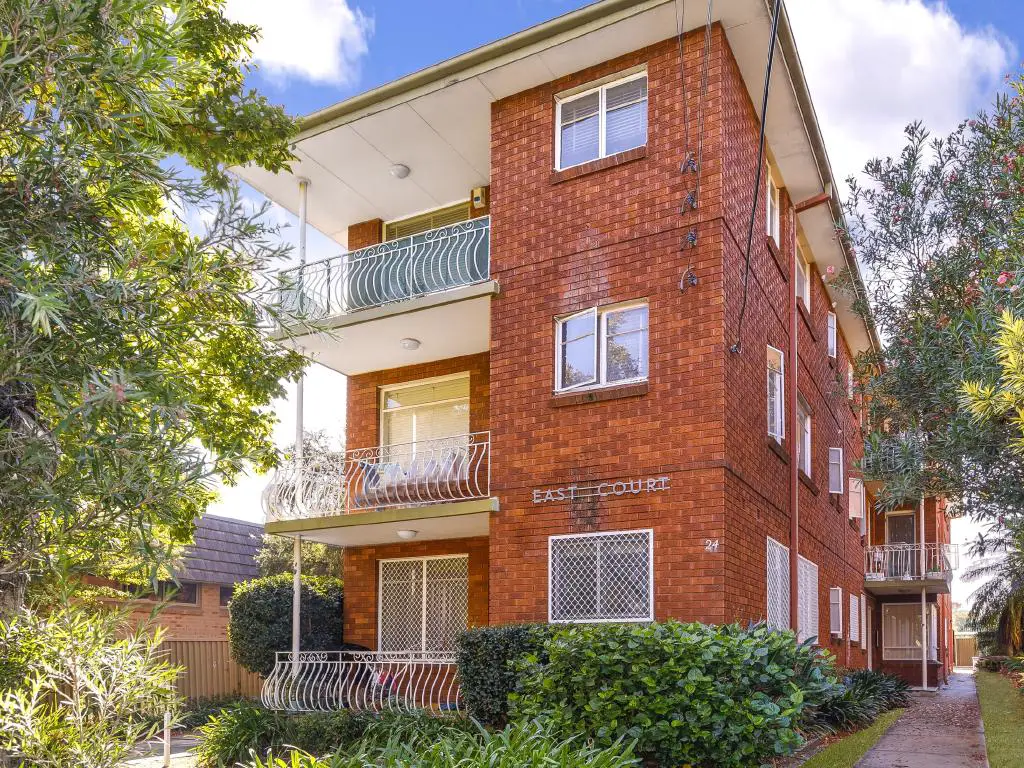
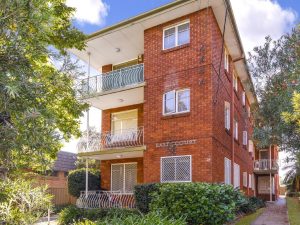
A three-storey older style apartment blocks with split systems installed on the back wall

A scissor lift which may need to be used in some apartment installations
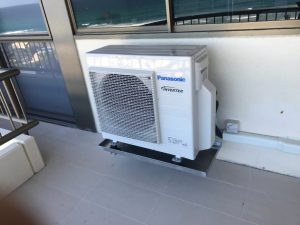
An example of an external unit on the balcony of an older style apartment.
Example 4- Installing a Split System into a Third Floor Apartment
It is common with split system installations that work may be necessary on the external walls of the apartment, so often body corporate approval is required. Sometimes the body corporates of the older style apartment blocks do not have established guidelines around installing air conditioners.
Without the body corporate guidelines, it is hard for Installers to know what the body corporate will allow and not allow. It may take a couple of different proposals put forth to the body corporate, until they give approval. With apartment blocks that have established guidelines, it makes it easier as for the Installers to propose a solution that meets their requirements from the start.
Based on what the body corporate will allow, will affect the installation options. Sometimes the body corporate will not allow very much external work, so the ducting needs to be run internally. Also, the body corporate may not allow the external unit to be positioned off the balcony on wall brackets, which would then require for it to be positioned on the balcony itself, sometimes taking up valuable space.

An example of an external unit installed on the balcony of an apartment
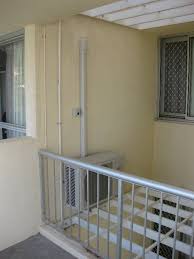
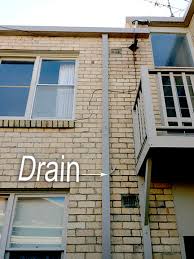
Installers will also need to consider, what is below the installation position externally, because it may hinder the installation. For example, if there is a garden or sloping ground below the installation position, Generally, body corporates prefer that the air conditioner drain is run to the apartment block drainpipe and is sometimes a requirement of being approved for the work.
The drain from the external unit on the roof of the apartment block is attached to the downpipe
Example 5- Installing a Split System into a Third Floor Apartment
It is important to consider that the outside ground is flat, when looking to use a scissor lift to install an external unit for third floor unit. Scissor lifts need a flat ground and they need to be able to access the property from the street. Using a scissor lift make the installation for the Installers like installing on a single-story apartment.
With such installations, owners need to be aware that there may be difficulties in satisfying the body corporate rules as well as the additional costs for such an installation. It is sometimes the case that Installers may put this type of installation in the too heard basket and may not want to perform the installation.
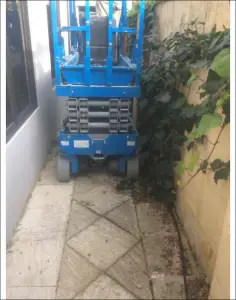
A scissor lift being used for an installation, with flat ground underneath
Example 6- Installing a Split System into a Third Floor Apartment Plus Car Park Level
When positioning internal units on solid brick walls covered in render and the preference of Installers generally, is not to use ductwork. The internal unit needs to positioned in the corner of the room, so the wiring can be drilled through the wall to the external wall. This allows the pipes, drain and electrical cable to be put through to the outside.
A split system positioned in the corner of the room
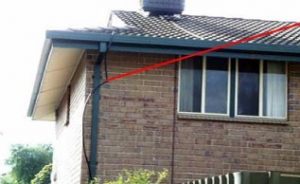
The external unit if positioned on the roof, is generally positioned at least 3 metres from the edge of the roof so it is not visible from the ground. The pipes from the internal unit can be run up through the eaves and onto the roof. Working at a third storey level requires a scissor lift to complete the external installation. If there is not flat ground below the installation position for the scissor lift, it would require an all-terrain lift, which adds more costs to the installation.
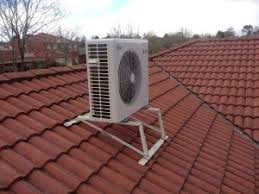
An external unit mounted on the roof of an apartment block
To run an electrical supply to the roof, ducting may be required, however it can be painted over to match the building. The brick work can be drilled out and have the cables laid inside, however this adds to installation costs and is a messy process.
Want to know more or would you like a quote to install a split system in your apartment? Please call us on 1300 944 133 or Request a Quote Now.
Split system air conditioning installation is quiet straightforward and can generally be finished within a day, depending on how many units are being installed. Compared to a ducted system split system units can also work out to be cheaper, depending on a number of factors including size and brand.
There are a few things a professional installer will need to check before giving you an accurate quote on your system.
Before installation commences
A home visit or Facetime will allow installers to evaluate particular aspects of your space prior to installation.
This will include:
Looking at structural aspects of the property helps technicians to determine the most effective place to put the unit and which size or brand may be most appropriate for different spaces within your home.
If you are having multiple units installed throughout the house technicians can design a system to match your property, cooling / heating needs and budget. This includes replacing any units that need updating.
On the day of the installation the process will generally occur in this order:
During clean up you can keep the unit on and ask any questions you might have on how to operate it. Many units come with at least one remote program already installed but this may take a bit of tweaking to make it perfect for your lifestyle. The technician will generally leave you with an operating brochure so you can set individual programs properly. Now the installation is complete you can enjoy your new system but be sure to contact your installer should anything go wrong once they have left.
One thing to tick off your list before going ahead with an installation is to consider what kind of structure you live in and if you’ll need to apply to the body coprporate for approval. Body coporates generally oversee apartment buildings and offices rather than free standing homes. It’s always important to check if approval is required as breaking the rules could lead to the forceable removal of your system; an avoidable and expensive exercise.
Most installation companies will also ask for body corporate approval before they start the work as they are usually making external alterations to a building. They can provide a plan that will indicate where the new unit is going to be located. Body corporates can be very particular about even the smaller details such as a duct cover colour or where in an apartment block an outside condensor is placed, so it’s best to send them your plans for approval before objections are raised.

What kind of rules need to be complied with?
Body corporates have similar sets of rules and requirements when making changes to a building. These involve things such as building code compliance, maintaining the asethics of a building and noise pollution. Below is a list of requirements you may be asked to meet as they are generally listed in an owner’s corporation document. We have broken them down into three main sections.
In terms of requirements for the placement and installation of air-conditioning equipment, Owners Corporation approval is essential and needs to comply with the following:
Aesthetics:
Noise
Safety
Other
Air conditioners are a major purchase for any Homeowner and sometimes for rental properties, even more so. Landlords often have budget constraints, which sometimes do not meet with the tenant’s expectations. Experienced Installers will know that it can be challenging to ensure both the Landlord and the tenants needs are met. With heating and cooling, usually installing a split system into the rental property is the most cost-effective way to satisfy everybody involved.
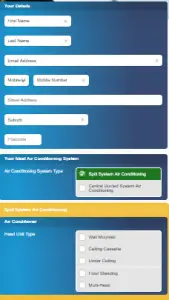
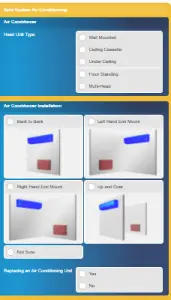
Some installers offer an online quoting tool on their website, which is perfect for rental properties. Landlords will have the opportunity to see what will be done in their investment property even before work begins and can request changes. It is a perfect tool especially for Landlords who live interstate or overseas and cannot physically meet with the Installer.
Below is an example of an online quoting tool.
Are you interested to know more or would you like a quote to install a split system in your rental property? Please call us on 1300 944 133 or Request a Quote Now.
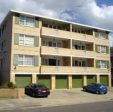
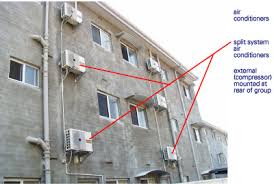
In general, the easiest and simplest installation in an apartment is a side back to back style. Apartments typically connect each other and shares walls, so the internal unit often needs to be positioned in the corner of the room connecting to the outside wall. In this location, the pipes can be laid out to the side of the unit through the wall to the external unit, which is typically located on a balcony outside.
An example of an apartment block, with the locations marked for the side back to back installation
This is the most common installation type for side by side apartments for Installers, with some common examples discussed below.
Side Mounted Back to Back-Example 1
When the internal unit is located right up against the external wall, it allows the pipes, drain and electrical connections to be run from the side of the air conditioner.
Once the unit is positioned next to wall, the hole for the piping is then covered to make it unseen. In some cases, the positioning may be impacted by blinds and window coverings, so the internal unit may need to be located a little away from the window, with a small ducting to reach the external wall.
The external unit can be located just outside the window, however this based on Homeowners own choice. Some owners may not prefer the external unit to be at the front of their apartment and may decide to run ducting around the side of the apartment to the back. This involves additional costs and will require body corporate approval. The ducting can be painted to match the colour of the building.
An example of a side back to back installation in an apartment, with a small amount of ducting
External units located at the back of an apartment block, with the ducting closely matching the paint colour.
Side Mounted Back to Back- Example 2
Sometimes the terms of the body corporate approval impacts on where the external unit can be located. In some cases the external unit is only allowed to be mounted on the wall that belongs to the unit and sometimes requires permission may need to be granted from other apartment owners to use their property to be able to properly mount the air conditioner. However, it is not always necessary as the external unit position is sometimes above common property of the apartment block.
External unit mounted on wall bracket on a back wall of an apartment block
Internal unit located in a bedroom in a side back to back installation style
Side Mounted Back to Back- Example 3
In some instances, Homeowners may be told by some Installers that the job is impossible to complete. Some salesmen may be unfamiliar with the actual physical logistics of installing a split system in a side back to back style. It is best always to go with an experienced installer and to have an in-home quote appraisal conducted to be sure the advice received is correct.
A side back to back installation in an apartment block, showing the locations of both the internal and external units
Another example of a side back to back installation, with the external unit not visible
Side Mounted Back to Back-Example 4
Almost always with installations in apartment blocks, body corporate approval is necessary for external work to be performed. Sometimes permission is given quickly within a few days, however sometimes it can take longer, which can hold up the work being performed. Installers will sometimes use digital images of the property with markings to show the proposed external work, which can also help in the approval process.
Body corporate permission is necessary even when drain from the split system is connected to a downpipe off the side of the building. Drainage is important aspect of installing a split system because when in cooling mode, the water drains from the indoor unit and when heating the water drains from the external unit. The internal unit drain generally connected to the external unit, which means only one drain is needed to service both units.
Example of a digital photo of a property with markings to show the proposed external work

Side mounted back to back split installation in an apartment
External unit positioned on a balcony of an apartment, with no drainage visible.
Are you interested to know more or would you like a quote to install a split system in your apartment? Please call us on 1300 944 133 or Request a Quote Now.
Installing a split system on to an internal wall of an apartment is possible. However, each individual situation is different and needs to be assessed by an accredited Installer to find the best solution. In most cases, duct work will be required to lay the piping through the apartment to the external unit outside. Below are some examples of such installation cases and the solutions.
Installation of new replacement split system
When replacing an old split system with a new split system on an internal brick wall, sometimes there is a cavity in the wall, with the existing pipe work inside. This makes it easy to pull out the old pipes and replace them with new pipes. The replacing of pipes is also necessary to ensure that the installation warranty is valid. Replacing piping is not as easy as it seems, but for experienced Installers it should be a relatively smooth process.
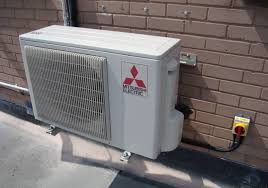
The external unit of split systems installed in apartments are generally placed high on the outside wall on wall brackets. Replacing a new external unit is relatively simple and can be fitted back on the existing wall brackets or the wall brackets can also be replaced. Generally, for high wall brackets Installers will use scaffolding to work off.
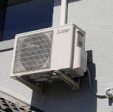
An external unit mounted on a wall with wall brackets
Installation on an Internal Brick Wall of an Apartment-Example 1
With internal brick walls in apartments, sometimes the wall is made from single brick, meaning there is no cavity inside the wall. For top floor apartments, one option is run the pipes internally along the wall and then through the roof space above. The piping can be attached to the external unit, which could be mounted on the flat roof above.
Sometimes depending where the internal unit is placed, the piping may need to be laid along the wall of a one or more rooms, until it reaches the external wall. For third or top floor apartments, the drain can be run down through the back of the apartment building, however body corporate approval is needed to allow this to happen.
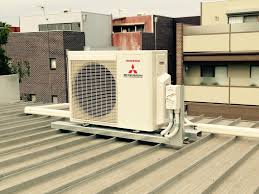
External unit mounted on the flat roof

Piping from the internal unit laid along the wall to the external wall
The piping may need to be laid through more than one room to reach the external wall
Installation on an Internal Brick Wall of an Apartment- Example 2
When an apartment is a middle apartment, meaning there is other apartments on each side, it only leaves the front and the back of the apartment available to run pipes and drains. Being a middle apartment can also impact where the internal unit is placed. The installation of an internal unit in the lounge room may require that the piping be run through an internal wall and then through another room, like a bedroom, to reach the external wall. Owners’ preferences for where the piping will be laid can be considered in these cases.
To lay piping across multiple rooms, internal duct work may be required. However, the piping can be placed in the corner for minimum disruption and they can be painted to match the wall. The pipes will need connect to the external unit, which can be possibly mounted on the flat roof above or on a balcony. The drain also needs to be laid through the property to the outside wall and can sometimes be connected to the external drainpipe of the apartment block.
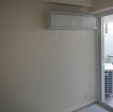
Internal unit in lounge room
Inside duct work in bedroom
Drain of split system is connected to the outside drainpipe of the apartment block.
An Installation requiring Internal Duct work on External Wall
This type of installation is one of the most challenging for Installers in apartments. In some cases, body corporates will not allow any type of external duct work and some walls are solid concrete with no cavity, so pipes cannot be laid inside the walls. Due to this, the internal units require internal duct work, meaning the pipes will be run internally along the walls and then covered with plastic duct.
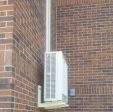
The external unit on balcony of apartment
An external unit with no visible external duct work

An internal unit installed in lounge room with duct work on wall
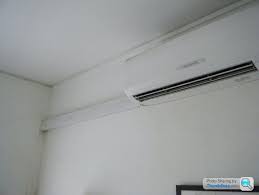
An internal unit in a bedroom with duct work on wall

Example of how a drain can be run through a bedroom to outside drainpipe
Electrical Requirements
The external units of split systems also need power, so cabling needs to run from the electrical switchboard to the external unit. With apartments, one solution is to run the electrical supply around the edges of the room inside a small plastic duct. It is barely noticeable and can be painted over to match the skirting. Furniture in apartments are also often placed around the walls of the room, so the electrical ducts can be very discreet.
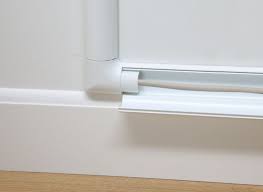
Electrical cabling placed in ducting just above the skirting board
The location of the switchboard is also important because the external unit requires a power source. Sometimes in cases where the external unit and the switchboard are some distance away from each other, the electrical supply can be run around the edges of the room above the skirting board. Positioning the electrical cabling like this is barely noticeable and can be painted over to match the wall.
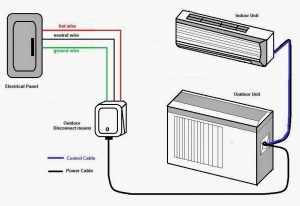
A basic electrical circuit of a split system
Want to find more or would you like an Installer to assess your apartment? Please call us on 1300 944 133 or Request a Quote Now.
