What is involved in a split system installation?
Air Conditioning FAQs
Split system air conditioning installation is quiet straightforward and can generally be finished within a day, depending on how many units are being installed. Compared to a ducted system split system units can also work out to be cheaper, depending on a number of factors including size and brand.
There are a few things a professional installer will need to check before giving you an accurate quote on your system.
Before installation commences
A home visit or Facetime will allow installers to evaluate particular aspects of your space prior to installation.
This will include:
- The location of the property and its windows
- Heat loading assessment
- Vent locations
- Load-bearing walls
- Air ducts
- Ceiling and wall space
- Space between the outdoor and indoor units
- Access to electricity.
Looking at structural aspects of the property helps technicians to determine the most effective place to put the unit and which size or brand may be most appropriate for different spaces within your home.
If you are having multiple units installed throughout the house technicians can design a system to match your property, cooling / heating needs and budget. This includes replacing any units that need updating.
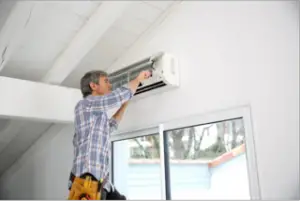
On the day of the installation the process will generally occur in this order:
- Mounting the inside Bracket: Using the information gathered during a home assessment inspection, installers start by securing a bracket to your interior wall. This is what your air conditioning unit will be mounted on.
- Creating a hole in the wall: This leads to the outside of your residence and allows the installer to run lines that will: Connect the inside and outside units via electrical wiring; Deliver cool air from the outdoor to the inside unit via tubing; and Remove excess moisture.
- Running the wiring through: Once the hole is made the installer can run necessary piping and wiring through it. The wires and pipes will be tied together using electrical tape and protected by a PVC tube. While this may seem an inevitable part of the process, minimising the physical distance between the inside and outside units works to speed up the installation. Technicians spending less time on site will further bring down your installation quote.
If the indoor unit is mounted on an interior wall, your wiring and piping night be run through your ceiling instead. - Securing the indoor unit: After securing the indoor unit on its mount, the pipes and wiring can be connected from between the outdoor and indoor units.
- Placing the outdoor unit: The outdoor unit converts air from the outdoors into cool or warm air to keep you comfortable. The placement of this unit will depend on which storey of your house your installation is on; For ground-level rooms, technicians will secure an outdoor condenser to the ground, usually as close possible to the indoor unit. If the room is on another storey, an outdoor unit can be secured on that level with its own mounting bracket.
- Connecting indoor and outdoor units: Once your outdoor unit is set up the technician can connect both to give your system a test run.
- Clean up: Most installation companies will clean up any mess they have made while performing an installation. It would be a good idea however to clear the space of any valuables first so that nothing gets dusty or accidentally broken.
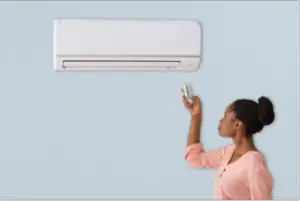
During clean up you can keep the unit on and ask any questions you might have on how to operate it. Many units come with at least one remote program already installed but this may take a bit of tweaking to make it perfect for your lifestyle. The technician will generally leave you with an operating brochure so you can set individual programs properly. Now the installation is complete you can enjoy your new system but be sure to contact your installer should anything go wrong once they have left.
GET A SERVICE OR REPAIR!
Simply fill in the form below & you'll receive a call from our team to organise your service or repair within 24 hours